Client Side Attack Vector: How to Conduct a Successful Phishing Attack
Introduction
This unit presents the steps to use Core Impact to perform a phishing campaign.
Features
- Import email list to be used as attack targets
- Clone Website to be used as bait
- Create a plausible email template
- Obtain information of the targeted user
Highlighted Modules
- Client Side Information Gathering RPT
- Client Side Attack Phase, Phishing
Walkthrough
Hosts
- Phishing target host
- Hostname:
win10vpn - IP Address:
10.27.34.80 - Credentials:
- User:
ACME\ruth.lane - Password:
Iamthe1
- User:
- Hostname:
Mail client configuration
- Access the machine of the Phishing target
- Hostname:
win10vpn - IP Address:
10.27.34.80 - Credentials:
- User:
ACME\ruth.lane - Password:
Iamthe1
- User:
- Open the Windows Default Mail App. There is a shortcut at the Task bar.
- Click on Add Account
- Select Advanced setup
- Choose Internet email
- Fill the account details
- Email address:
ruth.lane@acme.corp - User name:
ruth.lane@acme.corp - Password:
Iamthe1 - Account name:
Ruth
- Send your messages using this name:
Ruth - Incoming email server:
10.27.34.7 - Account type:
POP3 - Outgoing (SMTP) email server:
10.27.34.7
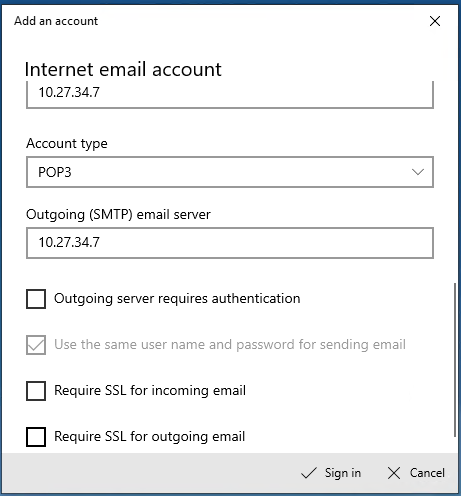
- Outgoing server requires authentication:
No - Require SSL for incoming email:
No - Require SSL for outgoing email:
No
- Click Sign in
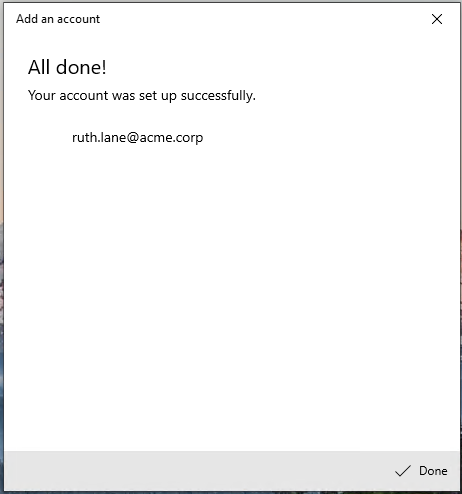
- You're all set!
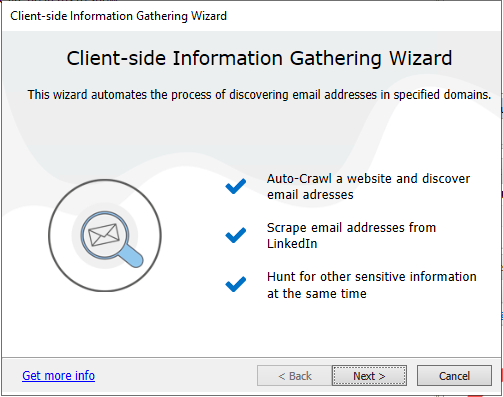
Client Side Information Gathering
- From the RPT Pane, select and click Client Side Information Gathering RPT to import the attack targets for the phishing campaign.
- Select
Import from fileand Click Next.
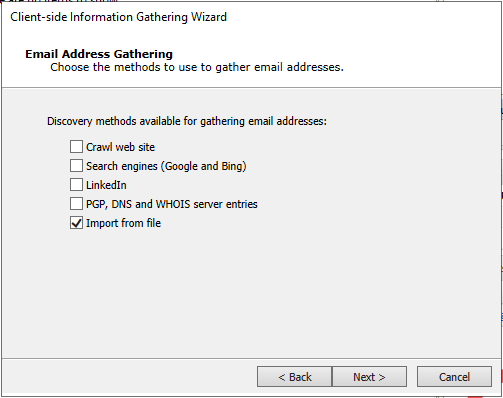
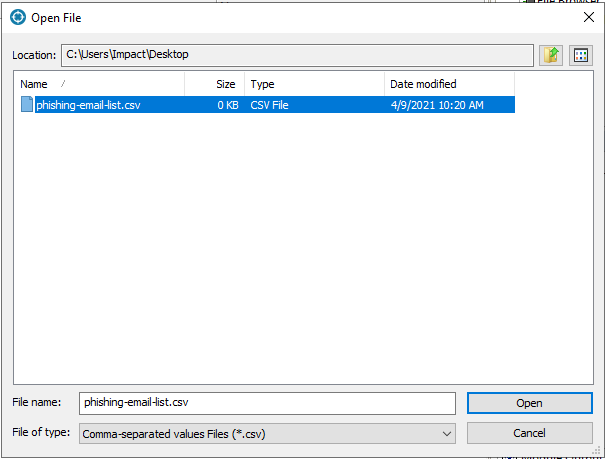
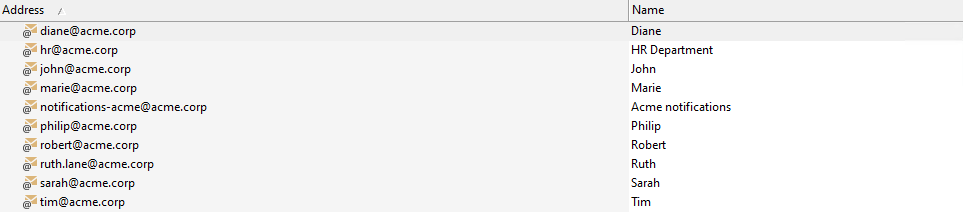
- Select the file to import:
C:\Users\Impact\Desktop\phishing-email-list.csvand Click Finish.
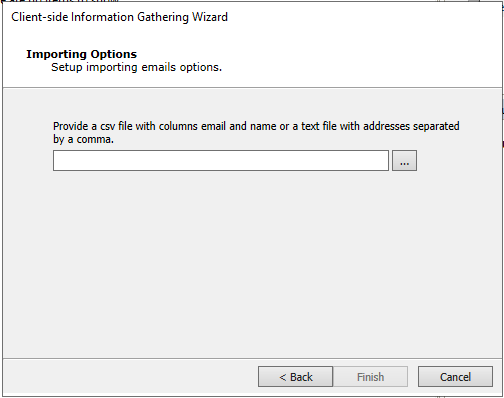
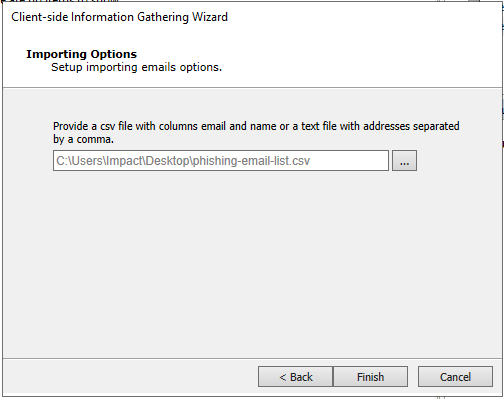
- Wait for Client Side RPT to complete gathering information.
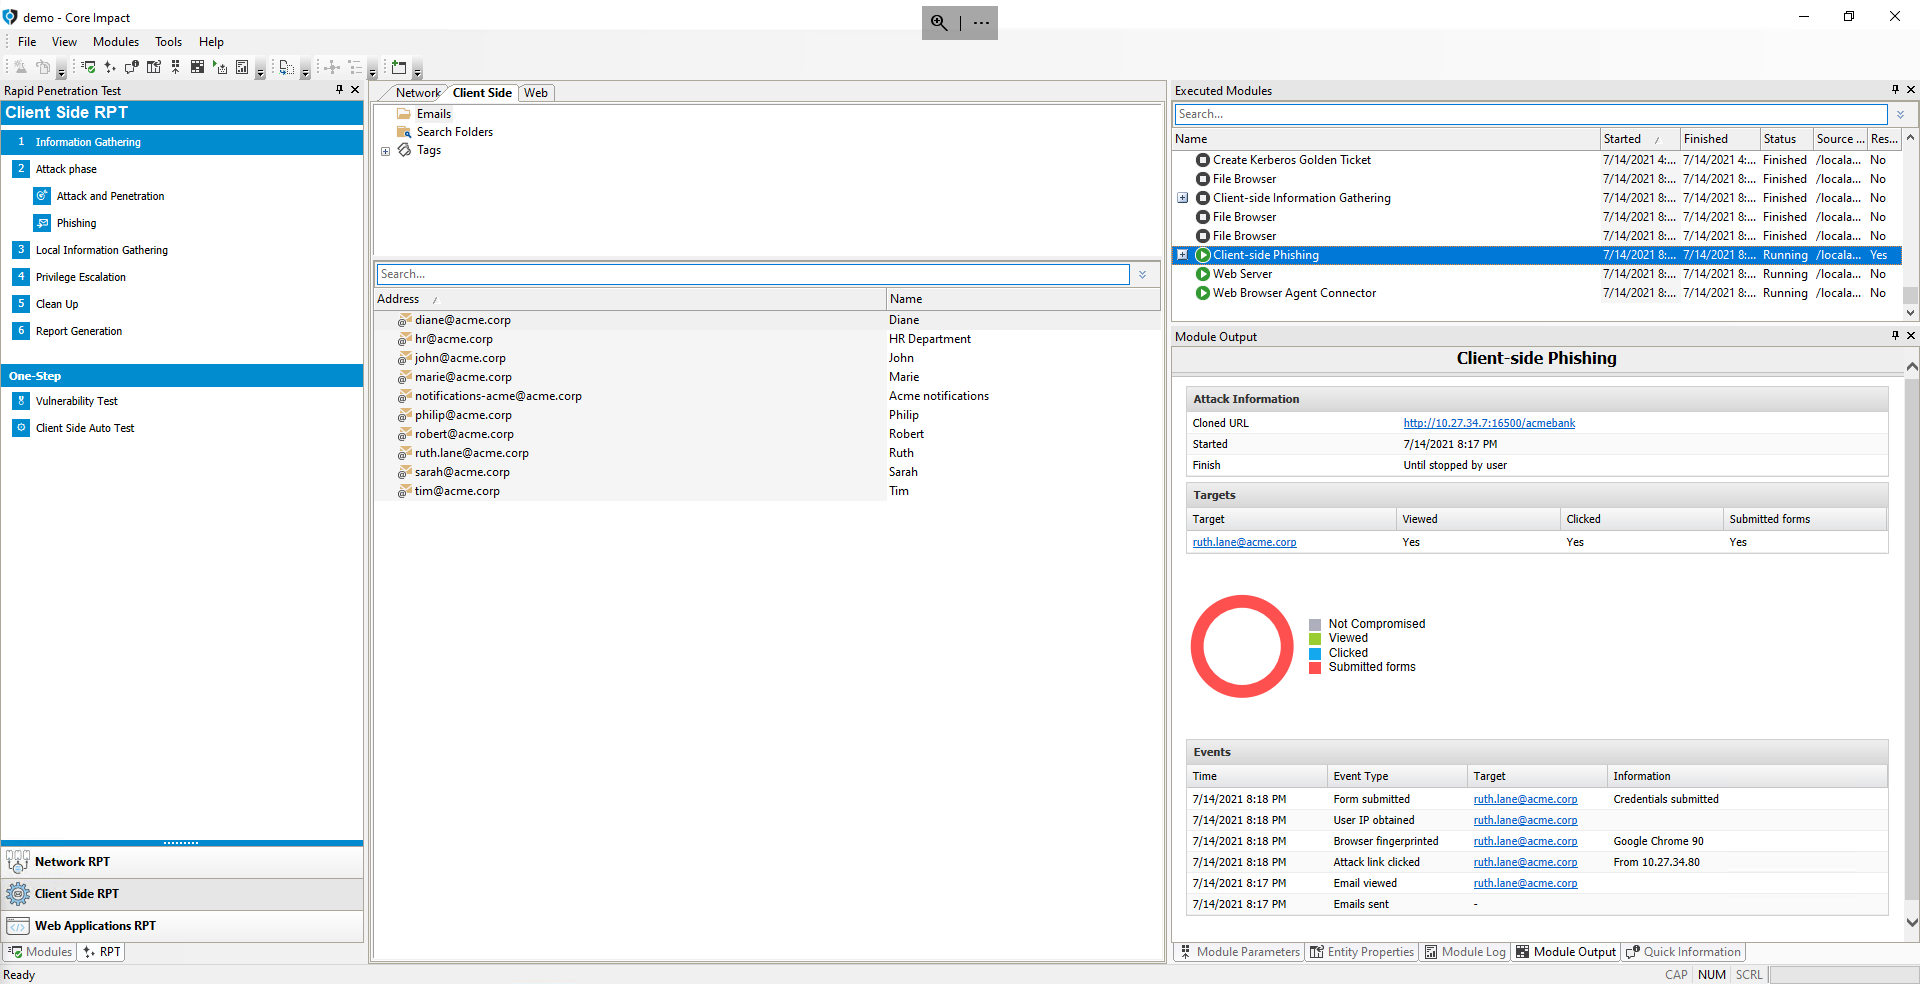
Client Side Attack Phishing Campaign Deployment
- From the RPT Pane, drag & drop Phishing RPT on the
ruth.lane@acme.corpemail.

-
Click Next.
-
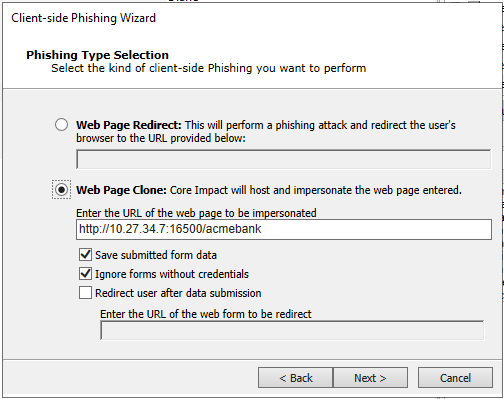
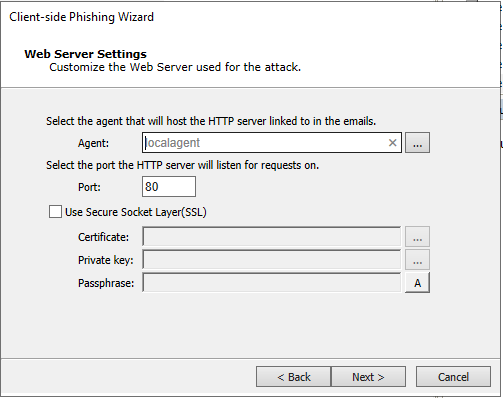
Select Web Page Clone option and enter the url
http://10.27.34.7:16500/acmebank. Click Next.
- Select the source email address. In this case
notifications-acme@acme.corpwill be chosen. Click Next.

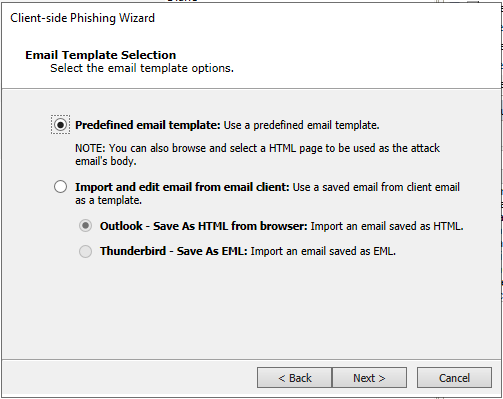
- Select Predefined email template. Click Next.
- Browse and select
acmebank_test.html. Click Next.

- Check the option Web Server Options to customize how the cloned website is displayed to the target user. Click Next.
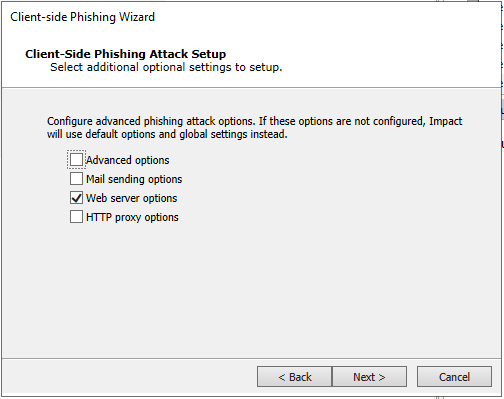
- Click Next.
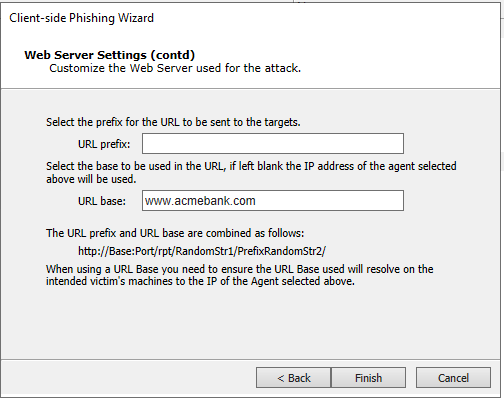
- Configure the URL base as
www.acmebank.com. Click Next.
- Wait for Client Side Phishing RPT to launch.
Act as the Target User
Now your role should change and you should act as the targeted user, in this case Ruth.
- Access Ruth's machine through Remote Desktop with the following credentials:
- Hostname:
win10vpn.internal.cloudapp.net - IP Address:
10.27.34.80 - Credentials:
- User:
ACME\ruth.lane - Password:
Iamthe1
- User:
- Open the default Windows 10 email client and refresh the mails.
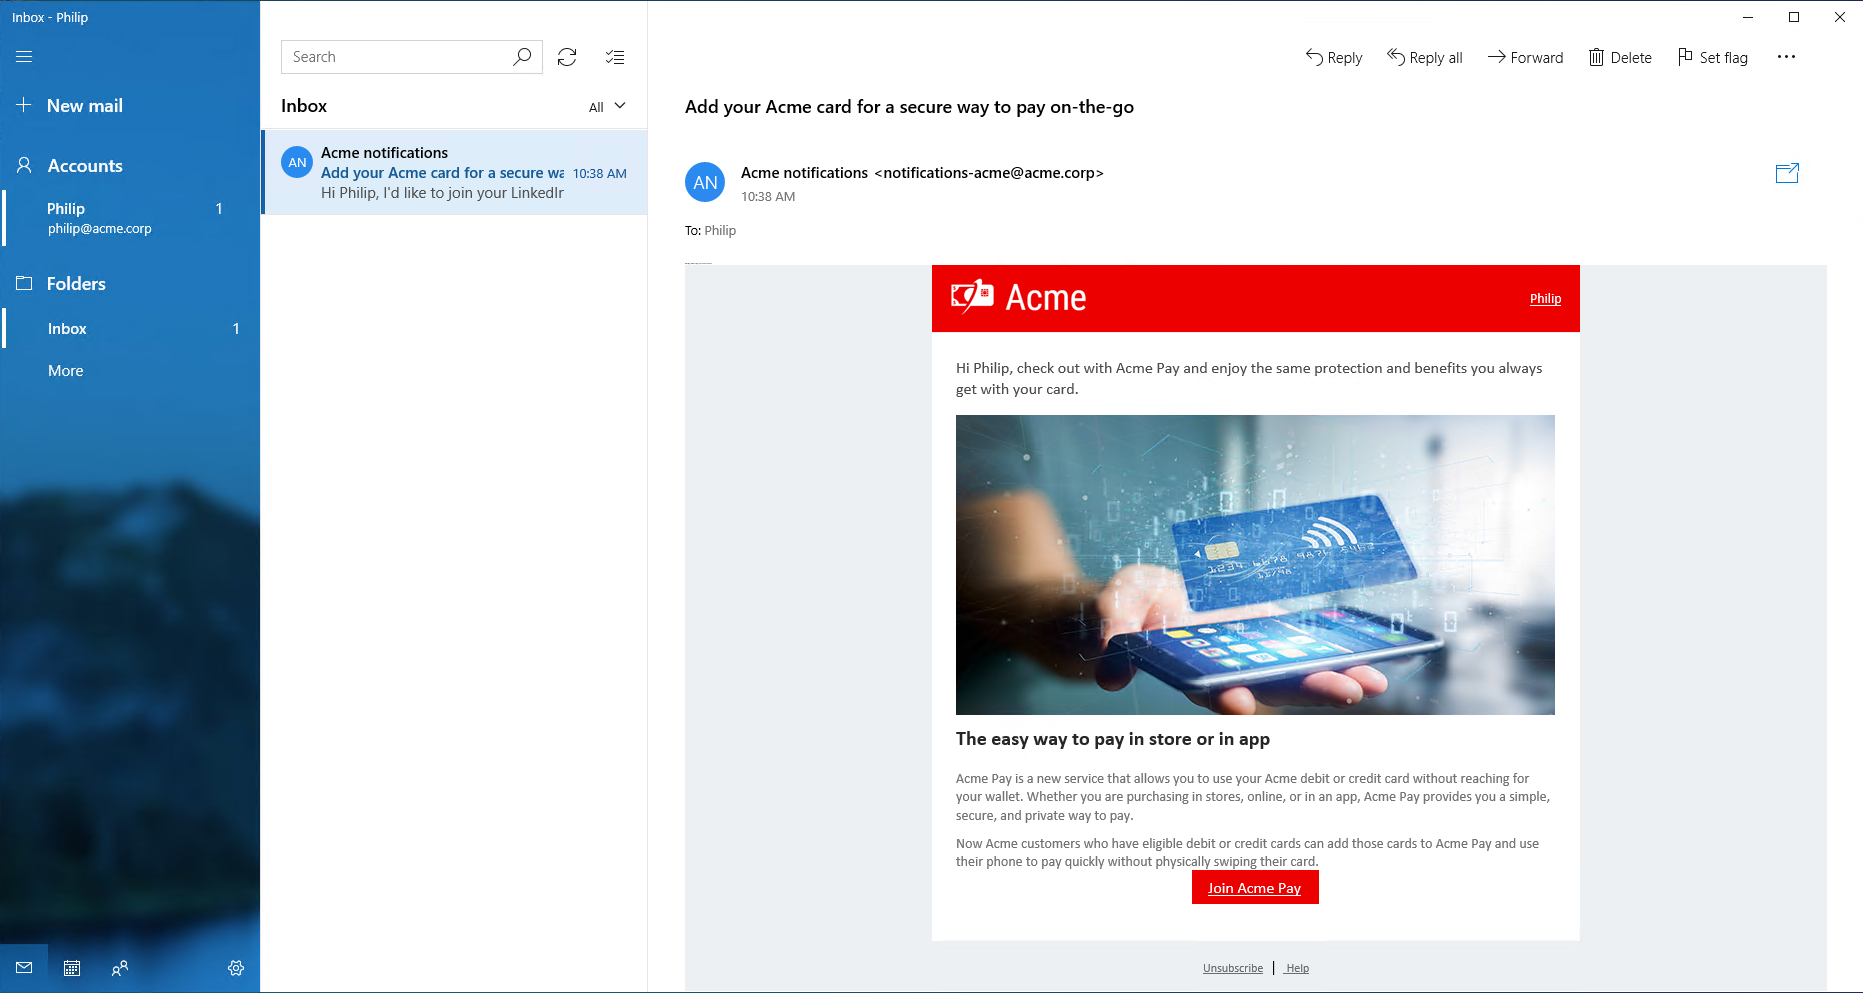
- Click on the link Join Acme Pay. A browser will be opened.
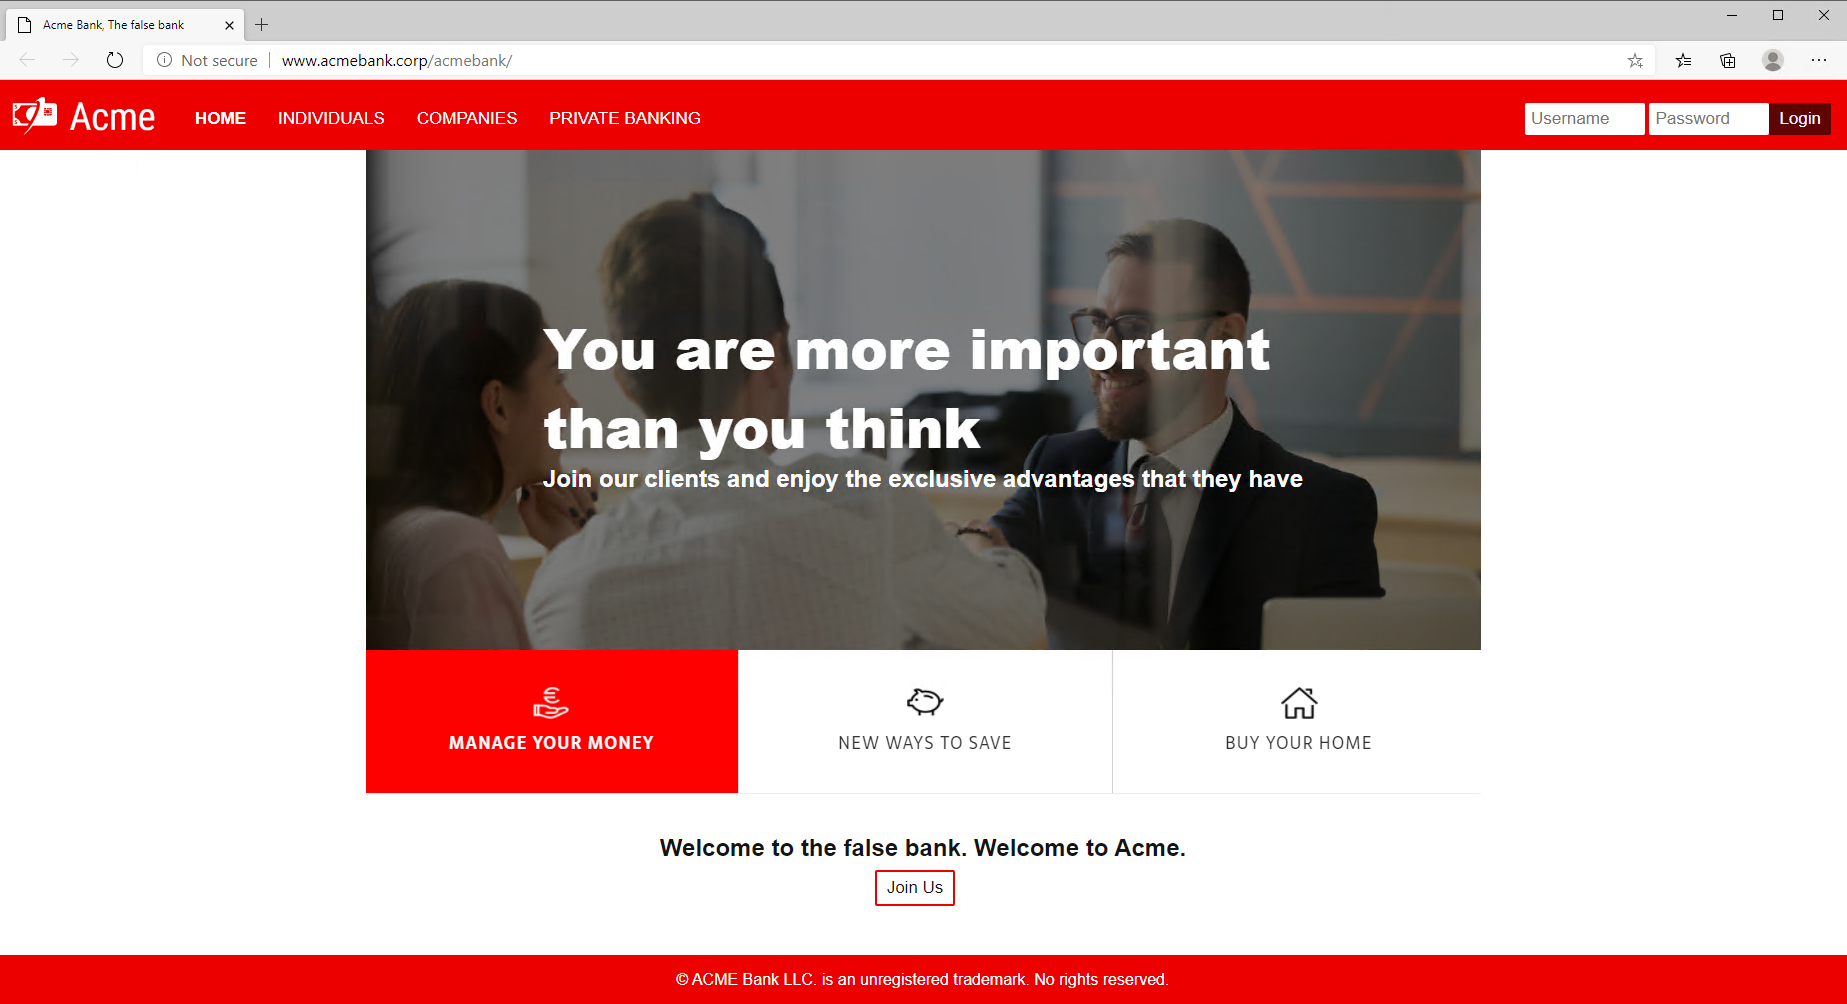
- Fill the login form on top right with Ruth's credentials.
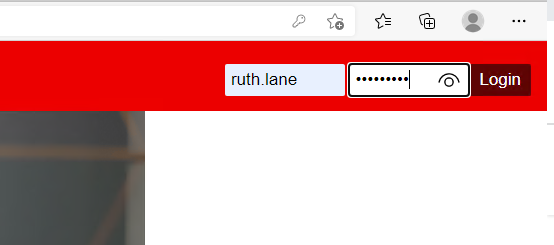
- Ruth will receive a message explaining the Phishing dangers

Back to Core Impact
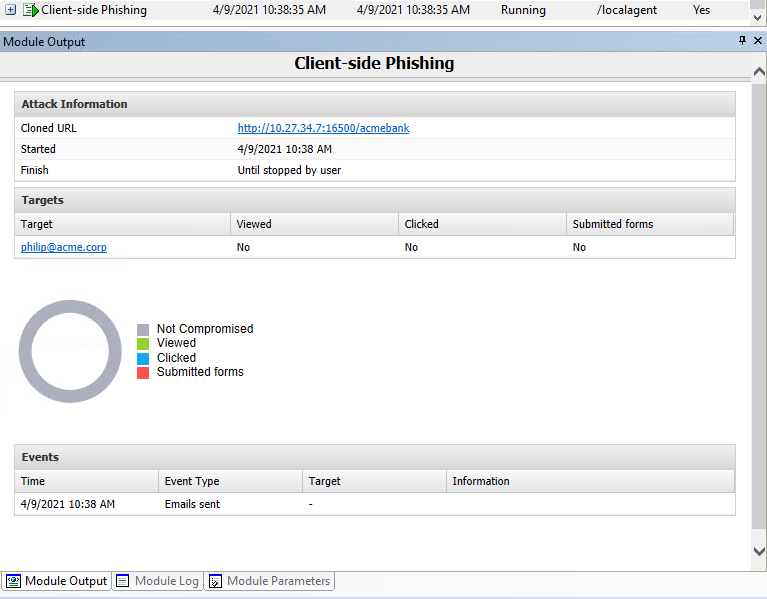
Once the attack has succeeded and Ruth has filled in his credentials, all the information is available in the console to continue with the next steps of the penetration testing:
- Hostname: 10.27.34.80
- Browser: Google Chrome 84
- Credentials. A next logical step would be to try to connect through RDP to that machine using the harvested credentials:
- User:
ACME\ruth.lane - Password:
Iamthe1
- User:
Generate Report of the Phishing Campaign
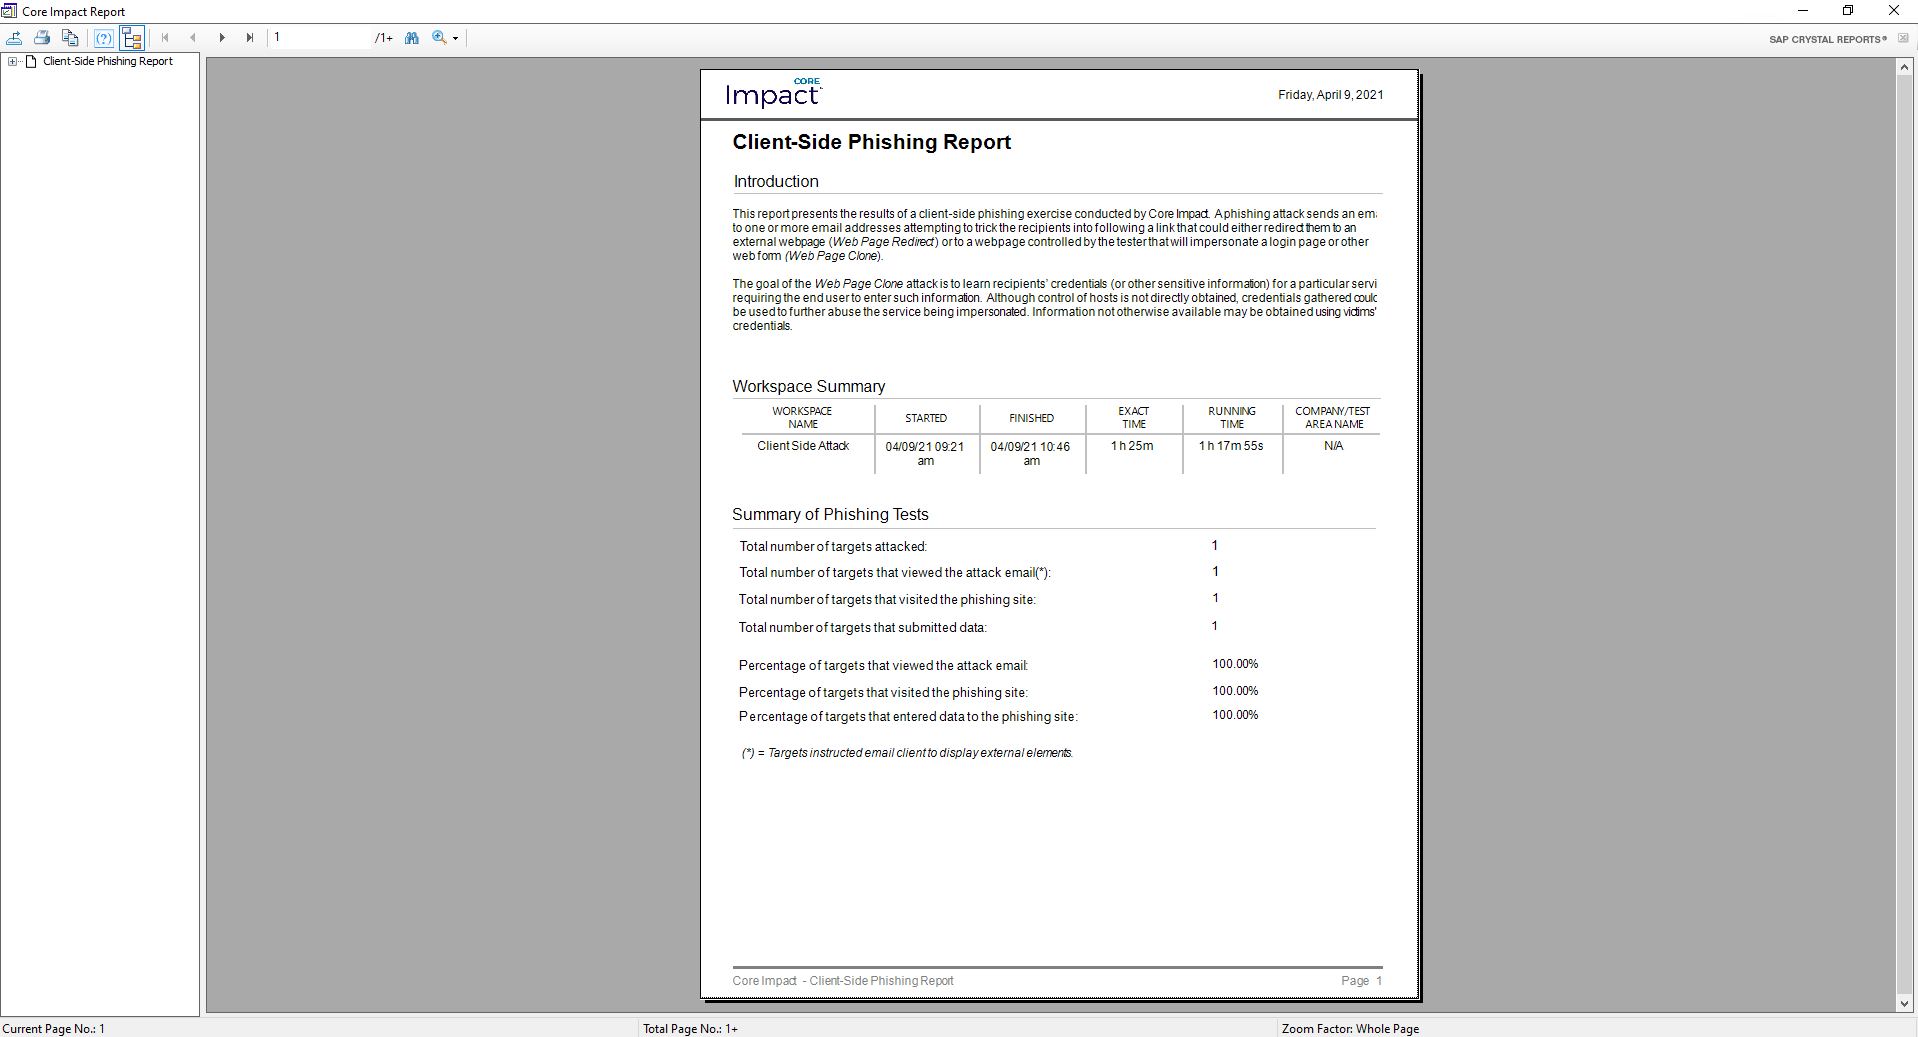
Finally, we'll generate a Client-Side Phishing Report to show the results of the Phishing campaign.
- From the RPT Pane, select and click Client Side Report Generation RPT.
-
Click Next.
-
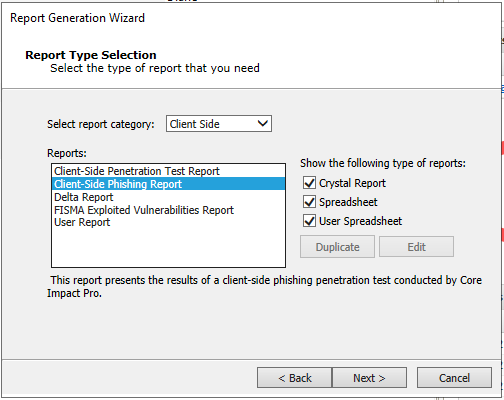
Select Client-Side Phishing Report and click Next.
- Click Finish.
The Client Side Report Generation RPT module will generate the report and open it using the program associated.
Though not shown here, Excel-based reports in Core Impact allow them to be customized after they're generated. Additionally, the user can also customize an existing Excel-based report before it's filled with the workspace's results, so that these customizations can be applied every time the duplicated report is generated. The user can update branding images, introductory texts, show/remove sections, and customize result tables and graphs.